OPNsense is an open-source, easy-to-use, and easy-to-build firewall and
routing platform based on FreeBSD.
It offers a wide range of features, including stateful inspection firewall,
Virtual Private Network (VPN), and intrusion detection systems, making it
suitable for home and business use.
Its user-friendly web interface allows for easy configuration and management.
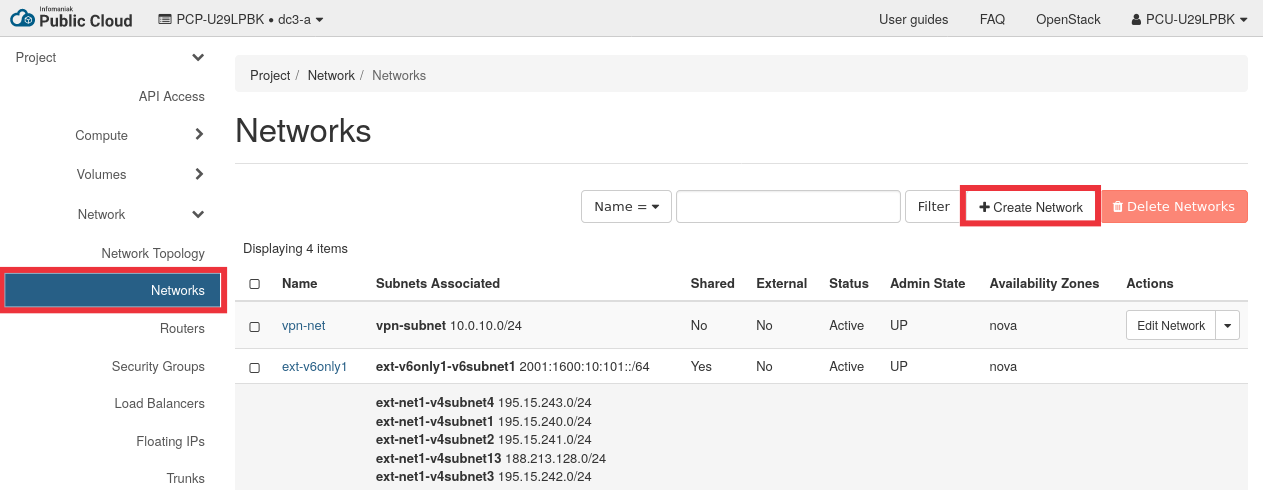
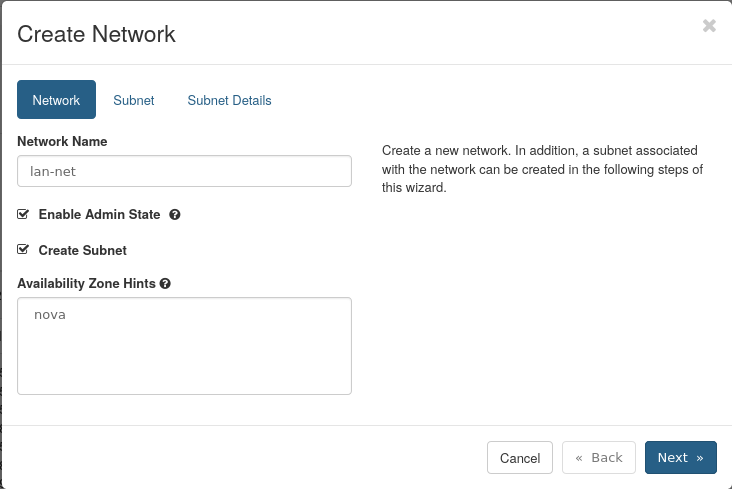
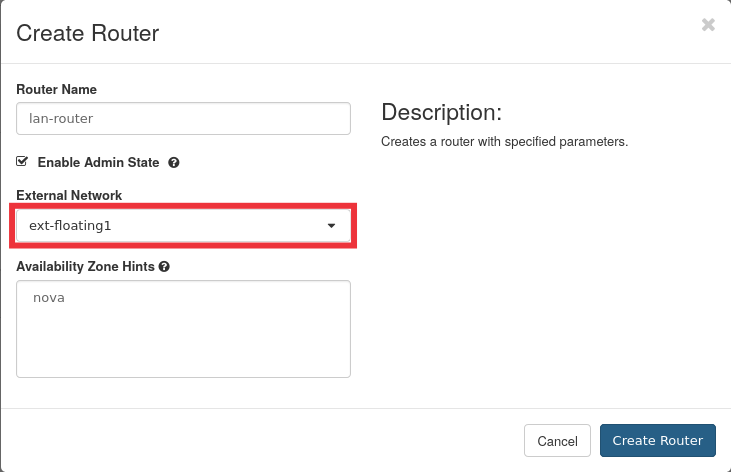
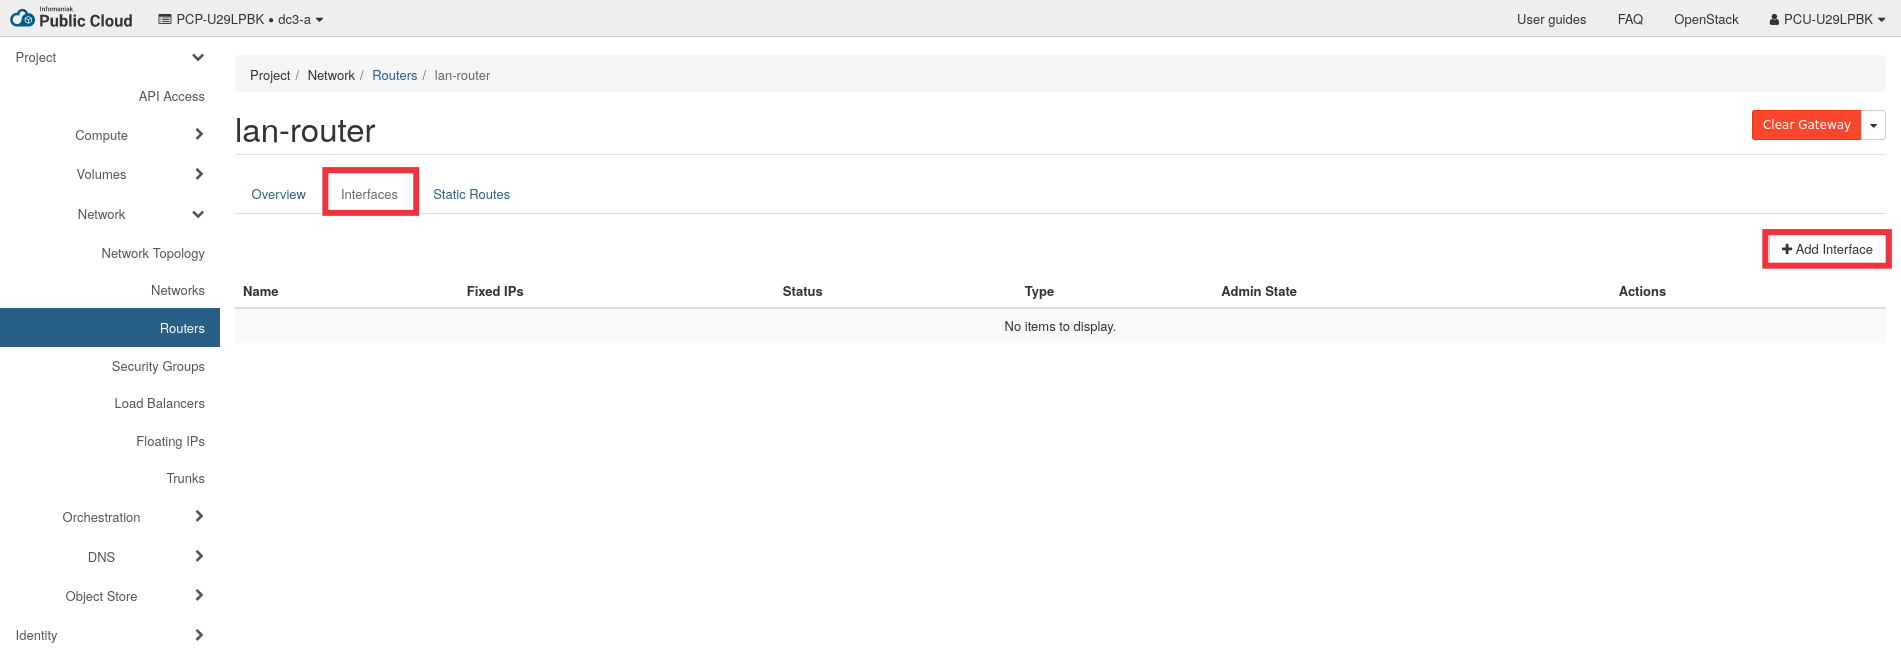
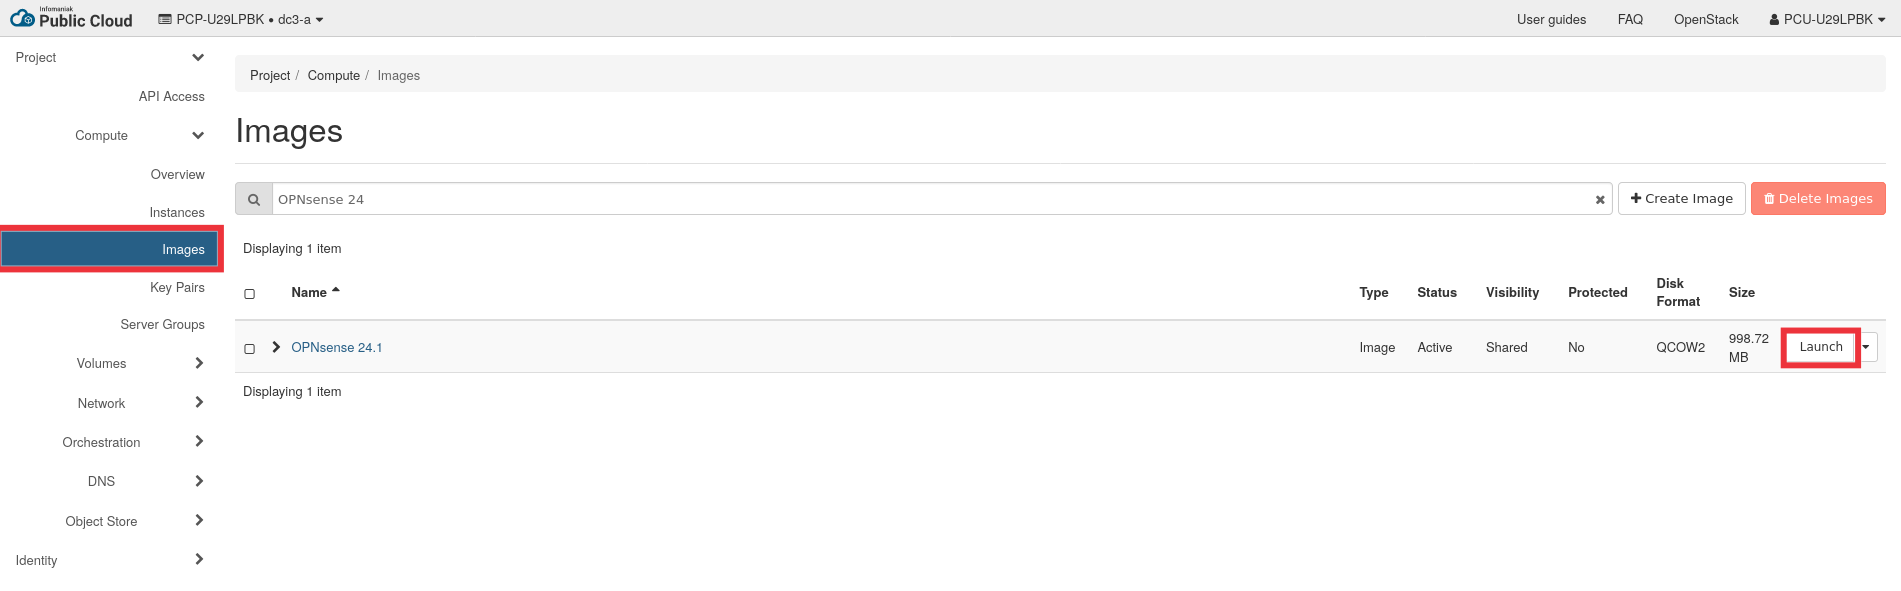
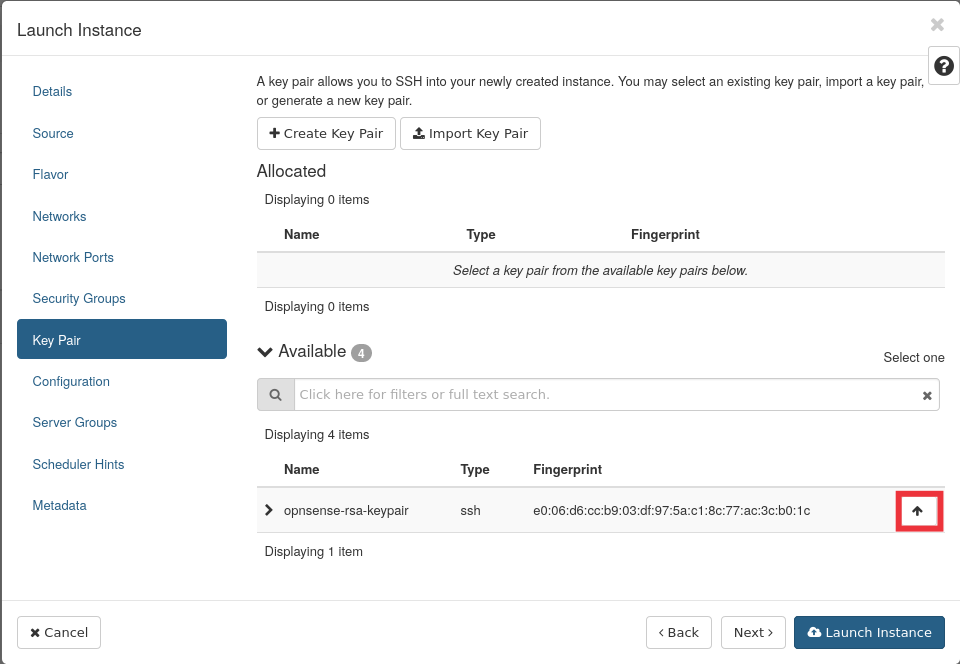
This tutorial will show you how to create and configure an OPNsense
appliance with a network interface on a private LAN where will reside your
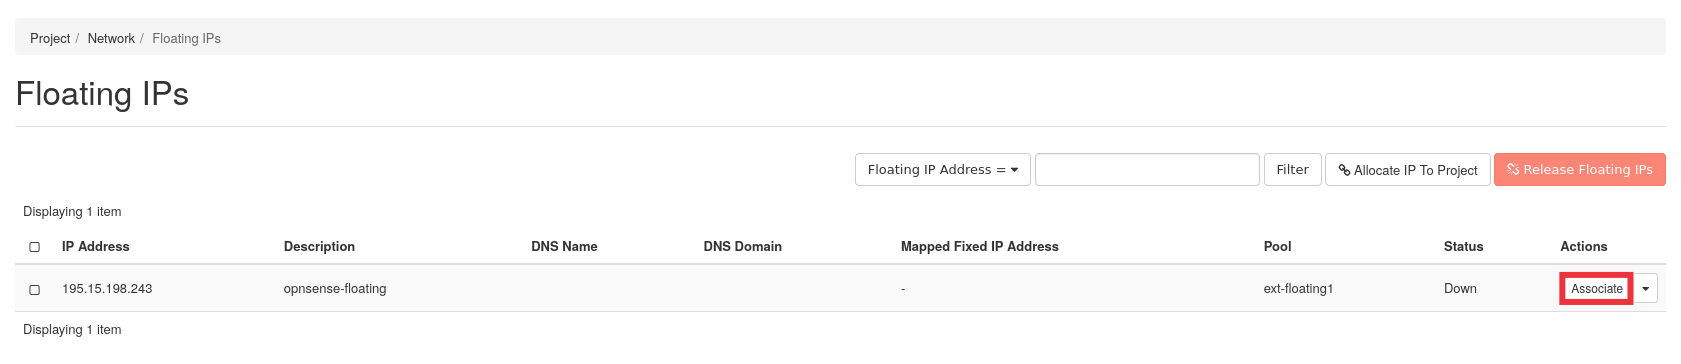
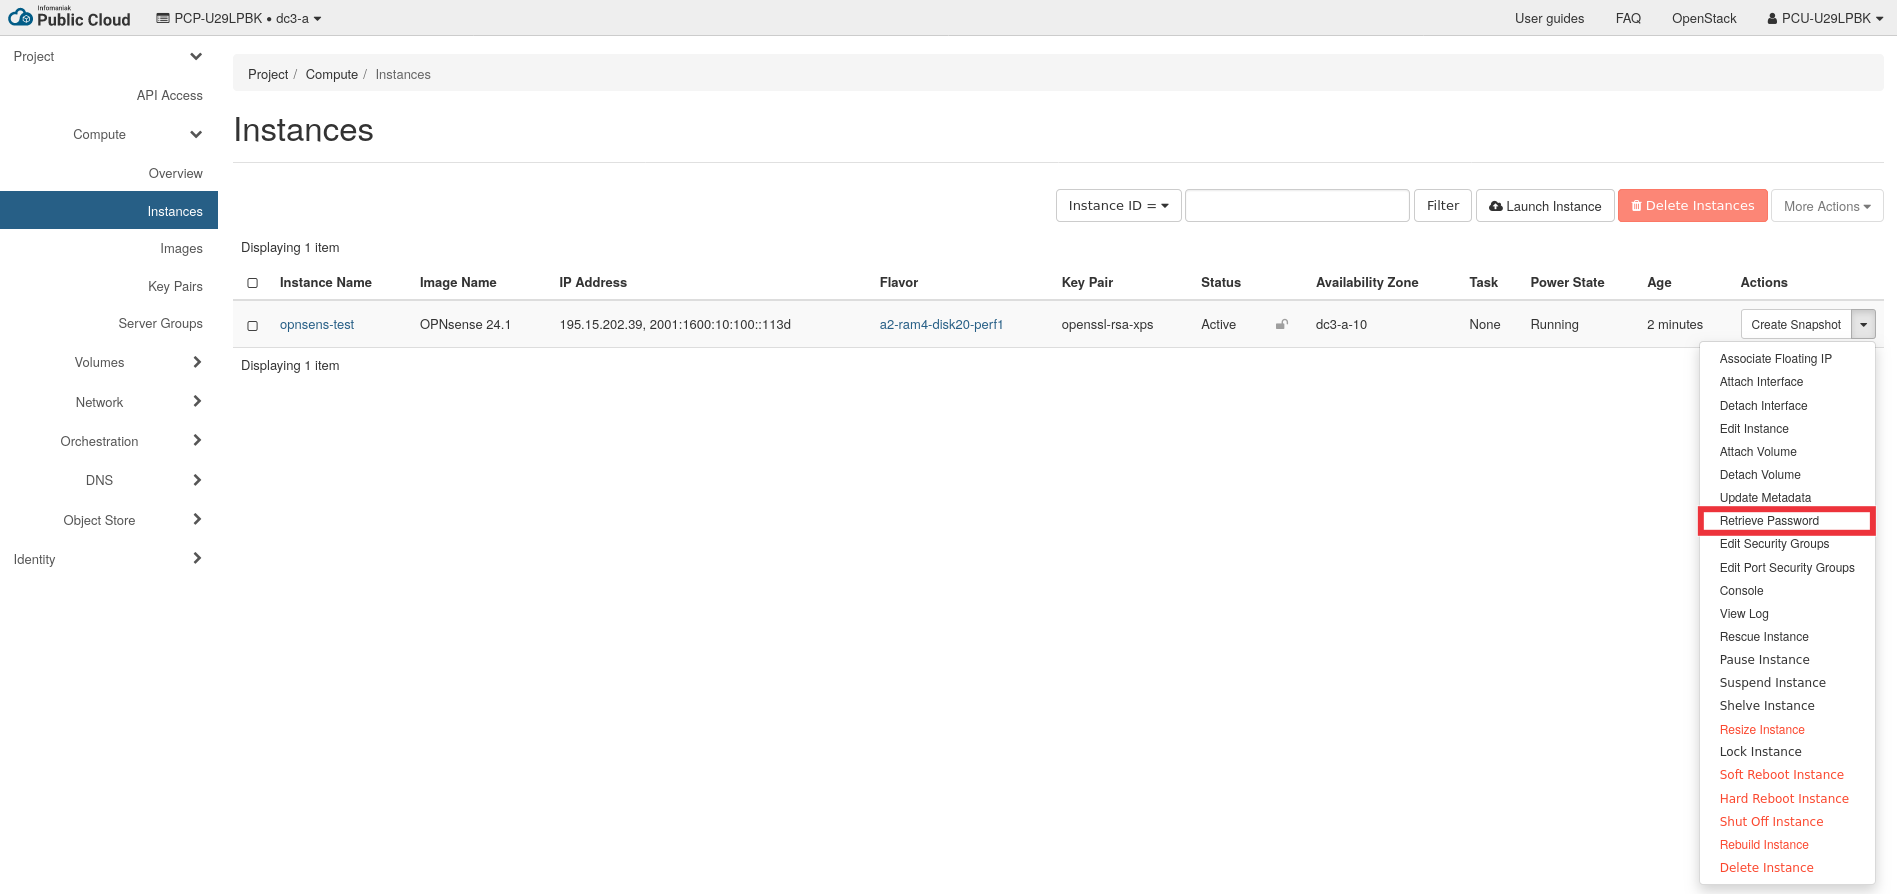
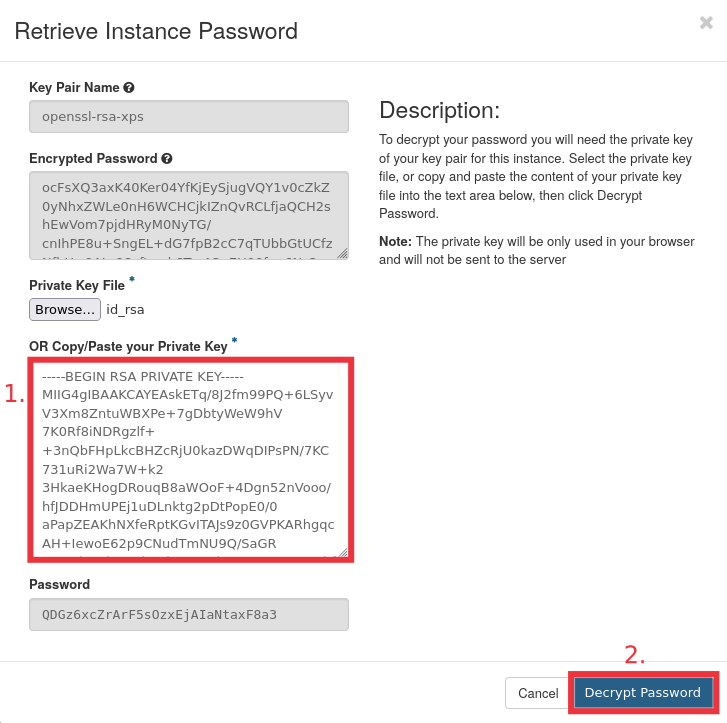
private VMs. It will also shows how to add a floating IP allowing remote access.
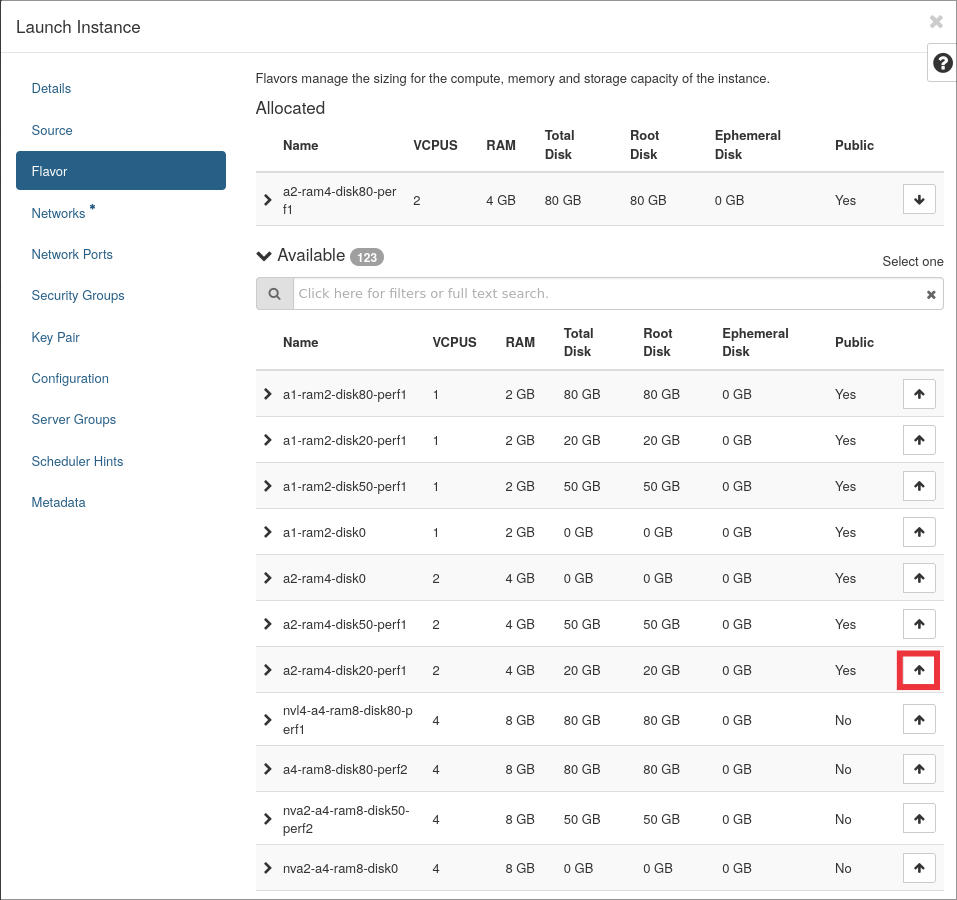
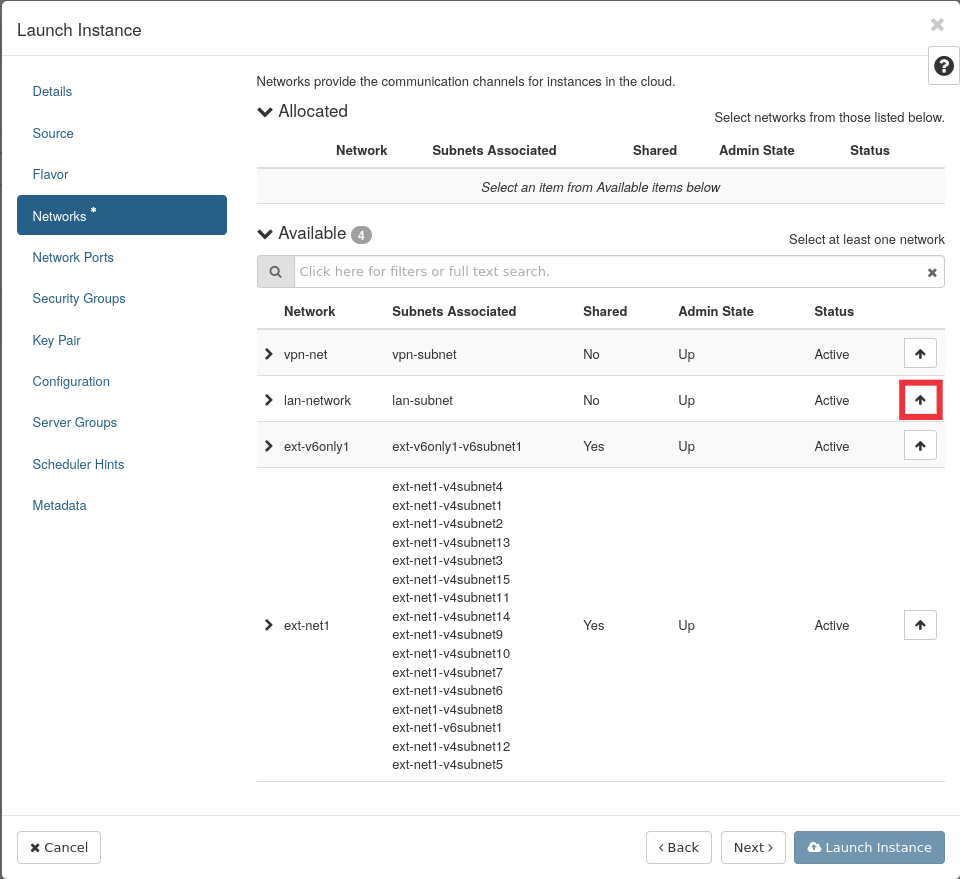
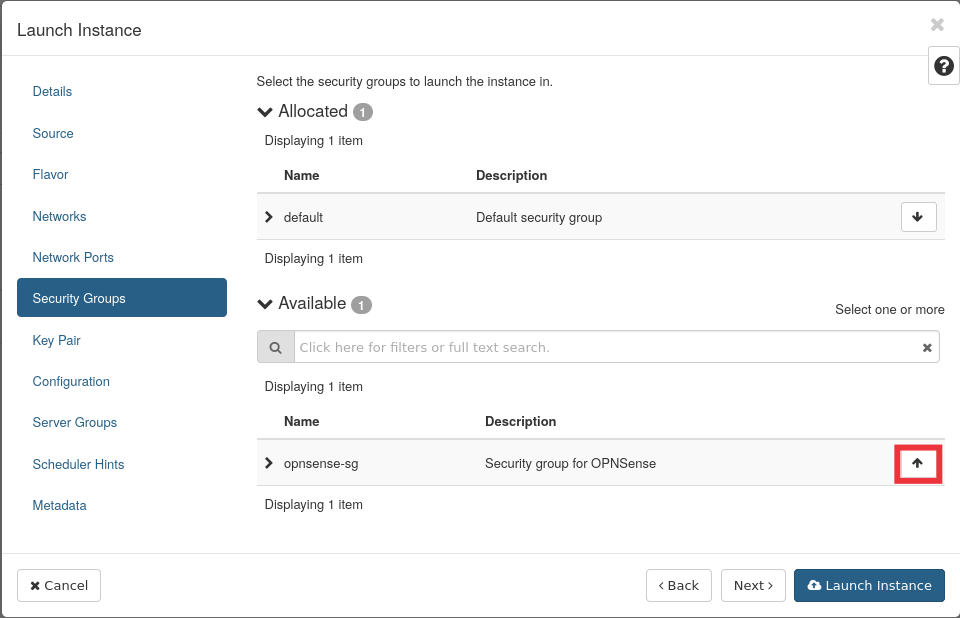
# Configure the OpenStack Providerterraform{required_version=">= 0.14.0"required_providers{openstack={source="terraform-provider-openstack/openstack"version="~> 2.0.0"}}}# Configure the providerprovider"openstack"{region="dc3-a"auth_url="https://api.pub1.infomaniak.cloud/identity"user_name="PCU-XXXXXXX"# (1)!tenant_name="PCP-XXXXXXX"password="a_super_password"}################################################################ ################################ Net and Subnet ################################ ################################################################# This is a network created by the provided to create floating ipdata"openstack_networking_network_v2""ext-floating1"{name="ext-floating1"}# Create the LAN network where our OPNsense will runresource"openstack_networking_network_v2""lan-net"{name="lan-net"admin_state_up="true"}data"openstack_networking_network_v2""lan-net"{name=openstack_networking_network_v2.lan-net.name}# The associated subnetresource"openstack_networking_subnet_v2""lan-subnet"{name="lan-subnet"network_id=openstack_networking_network_v2.lan-net.idcidr="10.0.0.0/24"ip_version=4}# Create a router and set floating-net at external networkresource"openstack_networking_router_v2""lan-router"{name="lan-router"external_network_id=data.openstack_networking_network_v2.ext-floating1.id}# Attach the router to vpn subnetresource"openstack_networking_router_interface_v2""lan-router-interface"{router_id=openstack_networking_router_v2.lan-router.idsubnet_id=openstack_networking_subnet_v2.lan-subnet.id}################################################################ ################################ Security group ################################ ################################################################resource"openstack_networking_secgroup_v2""opnsense-sg"{name="opnsense-sg"description="Security group for OPNSense" # We want our security group fully managed by Terraformdelete_default_rules=true}resource"openstack_networking_secgroup_rule_v2""opnsense-sg-ssh"{direction="ingress"ethertype="IPv4"protocol="tcp"port_range_min=22port_range_max=22remote_ip_prefix="0.0.0.0/0"security_group_id=openstack_networking_secgroup_v2.opnsense-sg.id}resource"openstack_networking_secgroup_rule_v2""opnsense-sg-https"{direction="ingress"ethertype="IPv4"protocol="tcp"port_range_min=443port_range_max=443remote_ip_prefix="0.0.0.0/0"security_group_id=openstack_networking_secgroup_v2.opnsense-sg.id}resource"openstack_networking_secgroup_rule_v2""tcp-metadata-server-ingress"{direction="ingress"ethertype="IPv4"protocol="tcp"remote_ip_prefix="169.254.169.254/32"security_group_id=openstack_networking_secgroup_v2.opnsense-sg.id}resource"openstack_networking_secgroup_rule_v2""tcp-metadata-server-egress"{direction="egress"ethertype="IPv4"protocol="tcp"remote_ip_prefix="169.254.169.254/32"security_group_id=openstack_networking_secgroup_v2.opnsense-sg.id}################################################################ ################################ Floating IP ################################ ################################################################data"openstack_networking_port_v2""opnsense-port"{network_id=openstack_networking_network_v2.lan-net.idfixed_ip=openstack_compute_instance_v2.opnsense-vpn.network[0].fixed_ip_v4admin_state_up="true"}resource"openstack_networking_floatingip_v2""opnsense-vpn-floating"{pool=data.openstack_networking_network_v2.ext-floating1.namedescription="External IP for OPNSense-vpn"port_id=data.openstack_networking_port_v2.opnsense-port.id}# The Keypair form password generation and SSH access# WARNING: The public key must be in the OpenSSL RSA format (private key must begin with -----BEGIN RSA PRIVATE KEY-----)resource"openstack_compute_keypair_v2""opnsense-rsa-keypair"{name="opnsense-rsa-keypair"public_key="ssh-rsa AAA...."# (2)!}# Retrieve OPNSense image ID based on the namedata"openstack_images_image_v2""opnsense"{name_regex="^OPNsense"most_recent=true}# Retrieve flavor infodata"openstack_compute_flavor_v2""opnsense-flavor"{name="a2-ram4-disk20-perf1"}# OPNsense instanceresource"openstack_compute_instance_v2""opnsense-vpn"{name="opnsense-vpn"image_id=data.openstack_images_image_v2.opnsense.idflavor_id=data.openstack_compute_flavor_v2.opnsense-flavor.idkey_pair=openstack_compute_keypair_v2.opnsense-rsa-keypair.namesecurity_groups=[openstack_networking_secgroup_v2.opnsense-sg.name]network{uuid=openstack_networking_network_v2.lan-net.id}depends_on=[openstack_networking_subnet_v2.lan-subnet]}data"openstack_compute_instance_v2""opnsense-vpn"{id=openstack_compute_instance_v2.opnsense-vpn.id}output"opnsense-remote-ip"{value=openstack_networking_floatingip_v2.opnsense-vpn-floating.fixed_ip}