Lifecycle and Rescue
OpenStack provides many facilities to manipulate instances. The full details are available in the OpenStack site user guide (although some features may not yet be implemented at Infomaniak).
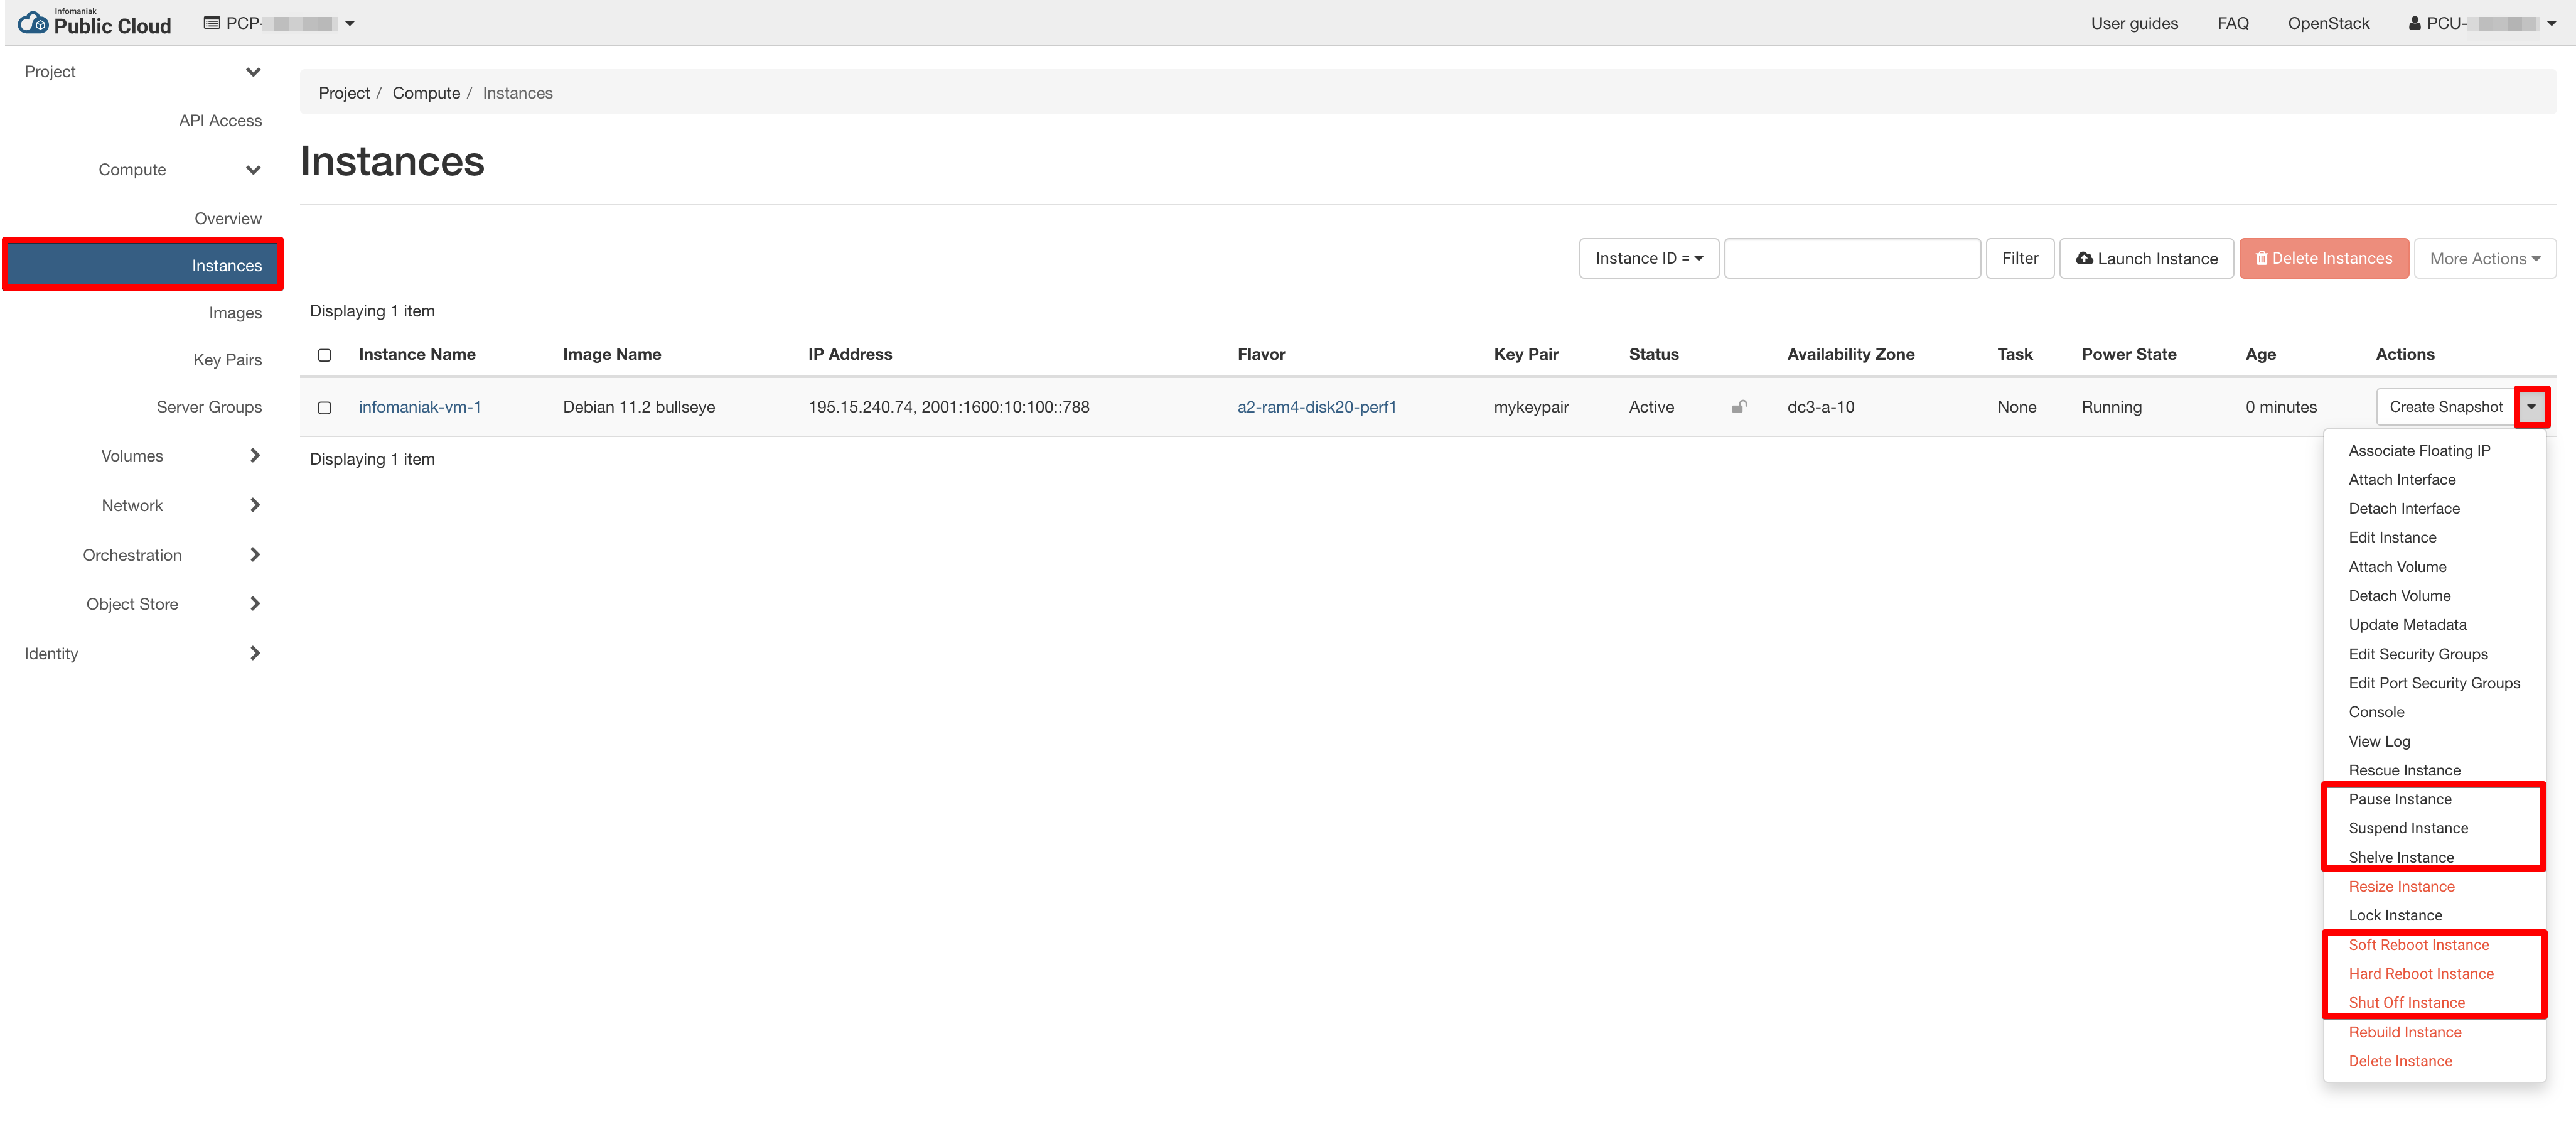
Stopping and Starting
Instances can be stopped and started in different ways. These operations are performed by the openstack command with appropriate actions.
reboot is equivalent to powering down the machine and then restarting it. A complete boot sequence takes place and thus the machine returns to use in a few minutes. A soft reboot attempts a graceful shut down and restart of the instance. A hard reboot power cycles the instance.
pause/unpause allows for temporary suspension of the instance. The instance is kept in memory but it is not allocated any CPU time. This is useful if you are performing an intervention on a set of servers and want to avoid that a instance continues to process while the intervention is underway. Unpause takes less than a second.
suspend/resume stores the instance onto disk and recovers it later (in less than a minute). This is faster than stop/start and the instance returns to the place is was when the suspend was performed rather than a new boot cycle.
shelve/unshelve. Shelving stops the instance and takes a snapshot of it. In the next hour your instance will be destroyed from the hypervisor but all the information will be kept in the Openstack database (such as IP) allowing you to unshelve the instance when you decide to. This allows you to save some money as you won't be charged for the CPU/RAM nor for the high available and performant CEPH cluster hosting your instance Disk. Instead you'll be charged for the cold storage hosting the snapshot of your instance which is cheaper.
These various approaches can be very useful in environments such as software builds or scale-out services to pre-create instances and then rapidly bring them online.
The actions can all be performed using the openstack unified CLI with
$ openstack server <operation> <hostname>
such as
$ openstack start infomaniak-instance-2
The status of a instance can be shown using openstack server show:
taylor@laptop:~$ openstack server show infomaniak-instance-2
+-----------------------------+------------------------------------------------------------------------+
| Field                       | Value                                                                  |
+-----------------------------+------------------------------------------------------------------------+
| OS-DCF:diskConfig           | MANUAL                                                                 |
| OS-EXT-AZ:availability_zone | b10                                                                    |
| OS-EXT-STS:power_state      | Running                                                                |
| OS-EXT-STS:task_state       | None                                                                   |
| OS-EXT-STS:vm_state         | active                                                                 |
| OS-SRV-USG:launched_at      | 2021-02-25T08:57:50.000000                                             |
| OS-SRV-USG:terminated_at    | None                                                                   |
| accessIPv4                  |                                                                        |
| accessIPv6                  |                                                                        |
| addresses                   | ext-net1=2001:1600:115:1::2e8, 195.15.241.14                           |
| config_drive                |                                                                        |
| created                     | 2021-02-25T08:57:28Z                                                   |
| flavor                      | cpu2-ram6-disk20 (2655c1e3-a43a-4dea-a957-650517e8fa72)                |
| hostId                      | 039729bd995a8226cb76588d9e24e7156f29e9ce5cbbf6e7ef4b8e70               |
| id                          | 0c2b0e8f-0a59-4d81-9545-fd90dc7fee73                                   |
| image                       | debian-10.8-openstack-amd64.raw (0c857837-f852-44dc-b986-bcc488bf7b70) |
| key_name                    | mykeypair                                                              |
| name                        | infomaniak-instance-2                                                  |
| progress                    | 0                                                                      |
| project_id                  | ac4fafd60021431585bbb23470119557                                       |
| properties                  |                                                                        |
| security_groups             | name='default'                                                         |
|                             | name='taylor'                                                          |
| status                      | ACTIVE                                                                 |
| updated                     | 2021-02-25T08:57:50Z                                                   |
| user_id                     | b1580497f51e4d10b9110c60c154562c                                       |
| volumes_attached            |                                                                        |
+-----------------------------+------------------------------------------------------------------------+
Renaming instances
Once a instance is created, its name is fixed when the openstack server create command is run. Renaming a instance is not supported. Alternatively, a new instance can be created using a snapshot of the old instance as follows:
- Snapshotting the source instance to create a copy of the instance.
- Creating the destination instance with the new name from the source snapshot.
- Check that the new service is working as desired.
- Delete the source instance
Rescueing an instance
Warning
This procedure has not been tested for Windows instances.
In some cases, a instance may fail to boot. Reasons such as incorrect configuration or a problem with the system disk can block the boot process. The instance console can provide useful diagnostic information on the root cause and may help to resolve the problem.
The other approach is to use the rescue functions of OpenStack where a instance is booted using the original image and the system disk is provided as a second disk to the instance. This disk can then be manipulated such as fsck to clear a filesystem problem or mounting and editing the configuration.
$ openstack server rescue infomaniak-instance-2
Info
By default the instance is booted from a fresh copy of the original instance image if no specific rescue image is provided. Otherwise you can use the rescue image we provide allowing you to connect with a password in addition to your keypair (see how at the bottom of this page)
** Click on Rescue Instance **

** Select an image and add a password**

This will reboot the instance and you can then log in using the key pair previously defined. You will see two disks, /dev/vda which is the new system disk and /dev/vdb which is the old one to be repaired.
The old one can be mounted and configuration files edited or fsck'd.
Example, to mount your broken disk (vdb)
root@infomaniak-instance-2:~$ lsblk
NAME   MAJ:MIN RM SIZE RO TYPE MOUNTPOINT
vda      8:0    0   2G  0 disk
└─vda1   8:1    0   2G  0 part
vdb      8:16   0  20G  0 disk
└─vdb1   8:17   0  20G  0 part /

root@infomaniak-instance-2:mount /dev/vdb1 /mnt/

root@infomaniak-instance-2:~$ ls -l /mnt/
total 76
lrwxrwxrwx  1 root root     7 Feb  6 10:30 bin -> usr/bin
drwxr-xr-x  4 root root  4096 Feb  6 10:33 boot
drwxr-xr-x  4 root root  4096 Feb  6 10:30 dev
drwxr-xr-x 68 root root  4096 Feb 25 08:58 etc
drwxr-xr-x  3 root root  4096 Feb 25 08:58 home
lrwxrwxrwx  1 root root    37 Feb  6 10:32 initrd.img -> boot/initrd.img-4.19.0-14-cloud-amd64
lrwxrwxrwx  1 root root    37 Feb  6 10:32 initrd.img.old -> boot/initrd.img-4.19.0-14-cloud-amd64
lrwxrwxrwx  1 root root     7 Feb  6 10:30 lib -> usr/lib
lrwxrwxrwx  1 root root     9 Feb  6 10:30 lib32 -> usr/lib32
lrwxrwxrwx  1 root root     9 Feb  6 10:30 lib64 -> usr/lib64
lrwxrwxrwx  1 root root    10 Feb  6 10:30 libx32 -> usr/libx32
drwx------  2 root root 16384 Feb  6 10:29 lost+found
drwxr-xr-x  2 root root  4096 Feb  6 10:30 media
drwxr-xr-x  2 root root  4096 Feb  6 10:30 mnt
drwxr-xr-x  2 root root  4096 Feb  6 10:30 opt
drwxr-xr-x  2 root root  4096 Jan 30 17:37 proc
drwx------  3 root root  4096 Feb 25 08:58 root
drwxr-xr-x  7 root root  4096 Feb  6 10:32 run
lrwxrwxrwx  1 root root     8 Feb  6 10:30 sbin -> usr/sbin
drwxr-xr-x  2 root root  4096 Feb  6 10:30 srv
drwxr-xr-x  2 root root  4096 Jan 30 17:37 sys
drwxrwxrwt  8 root root  4096 Feb 25 09:17 tmp
drwxr-xr-x 13 root root  4096 Feb  6 10:30 usr
drwxr-xr-x 11 root root  4096 Feb  6 10:30 var
lrwxrwxrwx  1 root root    34 Feb  6 10:32 instancelinuz -> boot/instancelinuz-4.19.0-14-cloud-amd64
lrwxrwxrwx  1 root root    34 Feb  6 10:32 instancelinuz.old -> boot/instancelinuz-4.19.0-14-cloud-amd64
On completion, the instance can be returned to active state with nova unrescue and rebooted.
$ openstack server unrescue infomaniak-instance-2
Using the infomaniak rescue image
Info
In case you broke your ssh authorized_keys file or lost your ssh key you can reboot your instance in rescue mode and connect via a password.
Your first have to set the temporary root password (assuming your instance name is infomaniak-instance-2)
$ openstack server set --property rescue_pass=my-Password-For-Ssh infomaniak-instance-2
Then rescue your instance using our rescue image Infomaniak Rescue Image and connect via ssh as root with the password you defined.
$ openstack server rescue infomaniak-instance-2 --image "Infomaniak Rescue Image"
Repair corrupted file system
Sometimes, you may have a corruted file system, that may avoid you to boot the instance.
Warning
Before running the repair, make sure this operation is needed on your instances. For example if your console log show ext4 calltrace.
In order to fix the issue, we have to rescue instance, then repair the partition on the rescued instance.
First, rescue the instance.
$ openstack server rescue infomaniak-instance-2
Then connect to the instance via SSH or vnc console. You can now list disks connected to the instance.
root@ik-rescue:~# lsblk -f
NAME    FSTYPE  LABEL    UUID                                 FSAVAIL FSUSE% MOUNTPOINT
sda
├─sda1
└─sda2  ext4             9f8b7c1d-fe1b-4801-b6cd-58f6636bec53    5.2G    41% /
sdb
├─sdb1  ext4             9190e23e-9bef-45bc-9582-70cb4be76703
├─sdb14
└─sdb15 vfat             62AB-524D
sr0     iso9660 config-2 2023-09-06-15-12-36-00
root@ik-rescue:~# mount -U 9f8b7c1d-fe1b-4801-b6cd-58f6636bec53
mount: /: /dev/sda2 already mounted on /.
root@ik-rescue:~# mount -U 9190e23e-9bef-45bc-9582-70cb4be76703
mount: UUID="9190e23e-9bef-45bc-9582-70cb4be76703": can't find mount source UUID="9190e23e-9bef-45bc-9582-70cb4be76703" in /etc/fstab.
Depending on partition type, we can use xfs_repair or fsck.ext4. Here, sda1 is an ext4 partition, we'll use fsck.ext4.
debian@test-rescue:~$ sudo fsck.ext4 -p /dev/sda1
/dev/sda1: clean, 25967/3268608 files, 394477/13074427 blocks
$ openstack server unrescue infomaniak-instance-2
Your instance will be rebooted on the repaired partition, and you should be able to connect to it.